Microsoft has added support for DNS-over-HTTPS protocol in their Windows Insiders build. Windows Insiders is the experimental version of Windows where users can try out new features. Current Windows 10 Insiders Fast Ring distributions now include a DNS-over-HTTPS (DoH) client.
In a simple word, DNS or Domain Name System is the system that points domain names to the IP address where the domain is it hosted. And DNS over HTTPS is the protocol for performing remote Domain Name System (DNS) resolution via the HTTPS protocol. It is intended to increase user privacy and security by preventing eavesdropping and manipulation of DNS data by man-in-the-middle attacks.
Currently Mozilla’s Firefox and Google’s Chrome browser support DoH at the browser level. But enabling DoH at the browser level has some problems especially for enterprise users. And it also doesn’t address the problem for all other apps that also use DNS.
So by introducing DoH at the OS level, Microsoft has addressed those issues. It will help system administrators better filter DNS requests while also enhancing privacy for regular consumers.
If you are running Windows 10 Build 19628 or later then you can use this feature. you can get this build by signing up for the Fast ring of the Windows Insider program. Just follow the below step by step process to enable it. Now, this may be a bit technical for average people so please do it if you know what you are doing.
Opening the Registry Editor
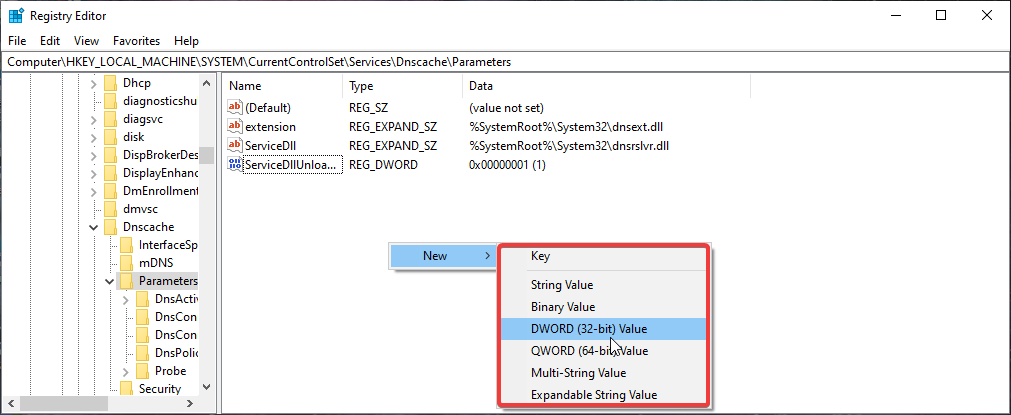
Navigate to the HKEY_LOCAL_MACHINE\SYSTEM\CurrentControlSet\Services\Dnscache\Parameters registry key.
Create a new DWORD value named EnableAutoDoh
Set its value to 2

Now you need to configure the DNS server settings as not all DNS providers currently support DoH.
To add a DNS server in the Control Panel:
Go to Network and Internet -> Network and Sharing Center -> Change adapter settings.
Right-click on the connection you want to add a DNS server to and select Properties.
Select either “Internet Protocol Version 4 (TCP/IPv4)” or “Internet Protocol Version 6 (TCP/IPv6)” and click Properties.
Ensure the “Use the following DNS server addresses” radio button is selected and add the DNS server address into the fields below.
For Windows to use DoH, use one of the following DNS servers: